
BY DR. LISA GOODMAN, DC, CCSP, CACCP, CF-L
If you own a foam roller or use one at the gym you may already be ahead of the game. However, there are three easy-to-implement techniques to foam rolling that can profoundly improve your recovery and advance your performance. Read on to find out why you should foam roll and how you should foam roll for the absolute best results.
Why use a Foam Roller?
Most people foam roll because they have pain or soreness in a muscle. Some people foam roll to increase their mobility or flexibility. So why does foam rolling help in these cases? Let’s briefly follow the anatomy of a muscle injury. When a muscle is strained or damaged it results in microtears that need to heal. The healing process involves a lot of inflammation which creates soreness and sometimes swelling. Once the healing process plateaus, a type of scar tissue forms out of the torn muscle fibers, inflammation and collagen (and other muscle building blocks). That scar tissue can also be called an adhesion. I like to refer to it as ‘fuzz’, basically a messy network of muscle, fascia and disorganized fibers gumming up your mobility.
That brings us to foam rolling. In the instance that your fuzz is relatively acute (new) or mild, foam rolling is a great addition to pre- or post-gym warm up. Foam rolling can also be done daily to continue to improve mobility in your arms, legs or back to prevent the formation of fuzz. Foam rolling is significantly more effective than stretching alone, if done correctly. There are some instances when I do not recommend foam rolling, read through to the end to be sure!
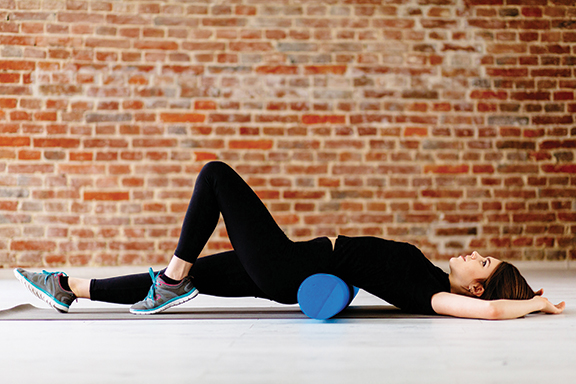
How Not to Foam Roll
It’s not wrong per-say, but the least effective way to foam roll is to lay on a roller and ‘roll out’ your muscle. Imagine an area of adhesion/fuzz in your quadriceps. This tight, disorganized area of adhesion isn’t going to respond very well to going over a speedbump over and over again. That is what it will feel like rolling your leg over a foam roller repeatedly. In many cases, rolling out your muscles can provoke the inflammation and create more pain and tightness.
Helpful Disclaimers
First, you can replace the words ‘foam roller’ with just about any mobility tool. If you have a stick, a ball or even a wine bottle, you might be able to use it the same way I’ll describe below. Second, if you have any questions whatsoever, ask your sports chiropractor or physical therapist to demonstrate any of the below and make sure you are physically capable and comfortable with the movements.
Best Kept Secrets of Foam Rolling
Slow and Deep – the best way to picture this is like squeezing the last bit of toothpaste out of the tube. You lay on the foam roller and move very slowly and very firmly as it rolls towards your heart. For example, on your IT Band you’d move from your knee towards your hip. This is best used to lengthen the muscle in question pre- or post-workout. This can be done about 3 times per muscle and can take about a minute to roll the entire length of the muscle. The more patient you are, the increase in benefits. This is also best used preventatively, without a specific area of injury. As you are rolling over your muscle, if and when you come upon a tender or lumpy area proceed to the next method, Stop and Hold.
Stop and Hold – Just like it sounds, with this method slowly roll over a sore muscle until you feel a significant bump or tender area. Then STOP and HOLD over this spot. Hold for 30-60 seconds until pain diminishes. For a small variation, try rocking side-to-side over areas without rolling. Breathing can significantly affect your results, be sure to take 2-3 deep breaths over the hold. This can be repeated over any and all tender spots. Recommend only one time at each spot.
Short to Long (advanced) – THE MOST EFFECTIVE Method – Also called self-myofascial release, this method involves holding down the muscle with the foam roller while you stretch it from a short position, to a long position. This is also very close to the way most professionals approach body work in the sports chiropractic world.
Step One – Flex (shorten) the target muscle, use the foam roller to apply pressure
Step Two – Holding firm pressure, stretch (lengthen) the muscle slowly
Step Three – Repeat 3-5 times on one area slowly
If we are using your quadriceps as an example, you will lay face down, leg straight, on the roller with pressure into the tender spot on your quad. Then slowly bend your knee fully stretching your quad. To do this on a hamstring, you would start seated on a chair with the roller under your hamstring. Then slowly straighten your leg.
**Much easier to visualize in person, there are dozens of examples of this on my YouTube Channel (search: Washington Park Chiropractic).
**Consult your treating physician, surgeon, health care provider prior to undertaking any home care stretching, myofascial release or exercise program
When NOT to use a foam roller
Foam Rolling is not going to be a good option for treatment if you have a 2nd or 3rd degree muscle or ligament tear or rupture. It is also not a great treatment plan if it doesn’t solve your problem within a week or two. If your problem is not solved, be sure to seek care from a licensed sports chiropractor who may need to apply more specific and aggressive techniques including Graston, ART, Dry Needling or Manipulation.